Building in compliance in your CI/CD pipeline with conftest
The code for the examples in this post can be found on GitHub.
In the previous post I introduced the Open Policy Agent as a method to validate configuration changes against policies to maintain compliance in your environment. In this post I will show how you can utilise the Open Policy Agent with conftest to build in compliance checks in your CI/CD (Continuous Integration/Continuous Delivery) pipeline and how conftest can be used to centrally manage the Rego policies.
In order to ensure all teams can build in compliance in their development life cycle, we need to ensure every change is validated. In other words: we need to incorporate it as part of the continues integration process. There are several requirements that need to be met before we can achieve this:
- The latest version of the policies needs to be easily accessible by developers
- Updates to policies can quickly be applied accross the organisation
- Policies need to be validated on correctness
- Configuration changes can not be applied without validation
These requirements ensure that every change applied by developers in the organisation keeps the system in a compliant state.
Centralising Rego policies
In order to make the policies accessible to all developers, we need to store the policies in a centrally accessible location. Luckily, conftest support storing Rego policies in a Docker registry. Under the hood, conftest is utilising ORAS. ORAS, or OCI Registry As Storage, is an initiative by Microsoft to support pushing artifacts to OCI Spec Compliant registries. Rego policies are stored in the Registry using the Bundle format specified by the Open Policy Agent.
Let’s look at an example of how that can work. First we need access to a Docker registry. At the moment of writing, only two registries support ORAS, namely the Docker distribution and the Azure Container Registry. For this example, I will be using the Docker distribution.
docker run -d --rm -p 5000:5000 --name registry registry:2
This command starts a local Docker registry, running in detached mode. Now we can push policies to the registry using conftest:
conftest push localhost:5000/policies:latest
This command pushes the policies in your local directory to the Docker registry. By default conftest looks for policies in the policy directory, but this can be overridden by specifying the --policy flag. The syntax is similar to how you would push a Docker container, where you specify the registry location, the name of the image and an optional tag.
These policies can then be pulled using the pull command:
conftest pull localhost:5000/policies:latest
The pull command by default pulls policies into the policy directory.
With central storage in place, a single (or multiple depending on the size of your organisation) compliance platform team can maintain the policies. Developers can easily access the latest version of the policies.
Validating the policies
Writing Rego policies can be hard. We don’t want to push policies that are broken. If the policies are broken, changes can be applied that need to be manually resolved later. Which is inefficient of course. Even worse, security vulnerabilities might make it to production! Luckily, Rego policies have built in support for unit tests.
Rego tests are just regular Rego policies, but with the rules prefixed with test_. Let’s look at an example:
package tags_validation

minimum_tags = {"ApplicationRole", "Owner", "Project"}

tags_contain_proper_keys(tags) {
    keys := {key | tags[key]}
    leftover := minimum_tags - keys
    leftover == set()
}
The function tags_contain_proper_keys validates whether a set of tags contain the minimum required tags. We can test this with the following unit test:
package tags_validation

test_tags_contain_proper_keys {
    tags := { "ApplicationRole": "ArtifactRepository", "Project": "Artifacts", "Owner": "MyTeam", "Country": "Nl" }
    tags_contain_proper_keys(tags)
}

test_tags_contain_proper_keys_missing_key {
    tags := { "ApplicationRole": "ArtifactRepository", "Project": "Artifacts", "Country": "Nl" }
    not tags_contain_proper_keys(tags)
}
This passes a set of tags to the function and asserts whether the function returns the expected result. Just like with regular code, it is important to validate what you write.
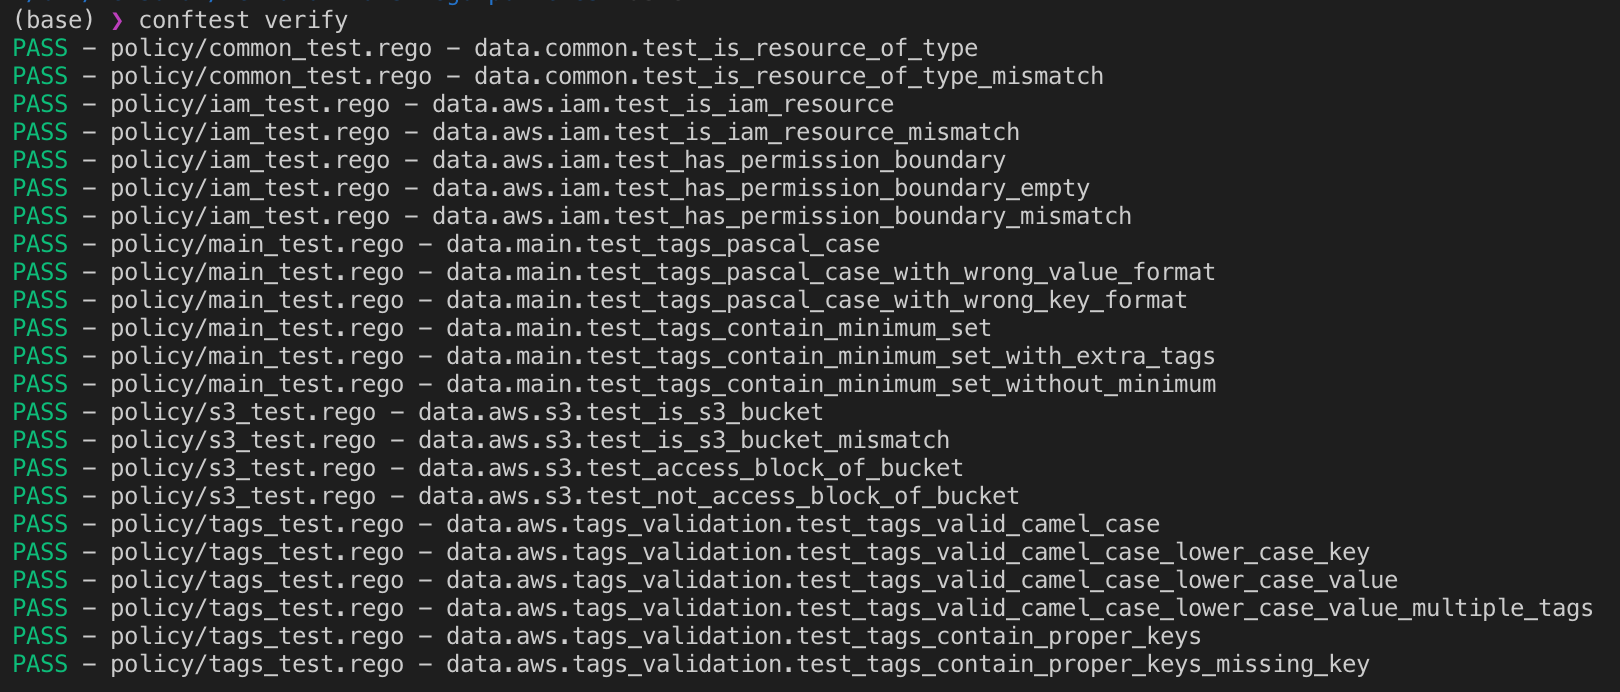
conftest supports the verify command to the test Rego policies:
conftest verify
Executing this command yields a list of passed and failed unit-tests:
Including conftest in CI/CD
We need to ensure that all configuration changes are validated against the policies. Otherwise the policies lose their value. If there is a way to avoid validating a changeset, there is no longer a guarantee that the environment is compliant.
One approach to solve this problem is to have a handoff in the CI/CD pipeline. Teams can build their own CI pipeline, where they apply their own tests and validation, but the deployment is handled by a different pipeline maintained by the platform team. This gives the teams control over their own code, but allows the platform team control over which changes are applied in production.
I will revisit the example of the previous post and assume we have development teams that want to deploy an S3 bucket using Terraform. We want to ensure that objects in any S3 buckets are not publicly accessible. So we want to ensure that every S3 bucket created in our environment has an Access Block. An Access Block prevents any object in the bucket from being publicly accessible. Take the following Terraform code for example:
resource "aws_s3_bucket" "profile_picture_storage" {
  bucket_prefix = "profile-picture-storage"
  acl    = "private"

  server_side_encryption_configuration {
    rule {
      apply_server_side_encryption_by_default {
        sse_algorithm = "AES256"
      }
    }
  }

  versioning {
    enabled = true
  }

  tags = {
    Owner           = "UserEngagement"
    Project         = "ProfileUploadService"
    ApplicationRole = "FileStorage"
  }
}
The code looks perfectly fine at first. Versioning is enabled, it has tags and server side encryption is configured. But it is still missing an Access Block:
resource "aws_s3_bucket_public_access_block" "profile_picture_storage_access_rules" {
  bucket = aws_s3_bucket.profile_picture_storage.id

  block_public_acls       = true
  block_public_policy     = true
  ignore_public_acls      = true
  restrict_public_buckets = true
}
This is a change that is easily missed in a code review, but we still want to ensure this bucket (and the application that depends on it) is never deployed, as this could lead to public objects in our S3 bucket. So we write a Rego policy to cover this situation:
package main

is_resource_of_type(resource, type) {
    resource.type == type
}

is_s3_bucket(resource) {
    is_resource_of_type(resource, "aws_s3_bucket")
}

is_access_block(resource) {
    common.is_resource_of_type(resource, "aws_s3_bucket_public_access_block")
}

access_block_of_bucket(resource, bucket) {
    is_access_block(resource)
    resource.change.after.bucket == bucket
}

s3_buckets[bucket] {
    bucket := input.resource_changes[i]
    is_s3_bucket(bucket)
}

buckets_with_access_blocks[bucket] {
    resource := input.resource_changes[i]
    is_access_block(resource)
    bucket := s3_buckets[j]
    not access_block_of_bucket(resource, bucket)
}

buckets_without_access_blocks[bucket] {
    buckets_without_access_blocks := s3_buckets - buckets_with_access_blocks
    bucket := buckets_without_access_blocks[_].address
}

deny[msg] {
    resources := buckets_without_access_blocks[_]
    resources != []
    msg := sprintf("S3 bucket has no access blocks: %v", [resources])
}
This policy uses a set difference between the set of buckets with access blocks and the full set of S3 buckets. This yields a set of buckets without access blocks. These are checked in a deny rule that checks if this set is not empty. If that is the case an error is thrown by conftest, reporting the violating terraform resources.
The Rego policy will be validated in the deployment pipeline. I will be using Tekton for this example. Tekton provides CustomResourceDefinitions for CI/CD pipelines in your Kubernetes cluster. It adds the Pipeline and Task abstraction in Kubernetes that leverage containers as building blocks to build a CI/CD pipeline.
First we need to create a Kubernetes cluster and deploy Tekton into the cluster:
kind create cluster --name test --wait 200s
export KUBECONFIG=$(kind get kubeconfig-path --name test)
kubectl apply -f https://storage.googleapis.com/tekton-releases/latest/release.yaml
These commands spin up a local Kubernetes cluster (using kind) and deploy the Tekton CustomResourceDefinitions to the cluster. Next we can define our pipeline:
apiVersion: tekton.dev/v1alpha1
kind: Task
metadata:
  name: terraform-plan
spec:
  inputs:
    params:
      - name: directory
        type: string
        description: The directory containing the build context.
        default: /workspace
  volumes:
    - name: terraform-volume
      configMap:
        name: terraform
    - name: data-storage
      persistentVolumeClaim:
        claimName: terraform-volume-claim
  steps:
    - name: cp
      image: ubuntu
      command:
        - cp
      args: [
        "-r",
        "/tmp",
        "$(inputs.params.directory)"
      ]
      volumeMounts:
        - name: data-storage
          mountPath: "$(inputs.params.directory)"
        - name: terraform-volume
          mountPath: "/tmp"
    - name: terraform-init
      image: blokje5/terraform-aws:latest
      workingDir: "$(inputs.params.directory)/tmp"
      args: [
        "init"
      ]
      volumeMounts:
        - name: data-storage
          mountPath: "$(inputs.params.directory)"
    - name: terraform-plan
      image: blokje5/terraform-aws:latest
      workingDir: "$(inputs.params.directory)/tmp"
      args: [
        "plan",
        "-out=tfplan"
      ]
      volumeMounts:
        - name: data-storage
          mountPath: "$(inputs.params.directory)"
      env:
      - name: AWS_ACCESS_KEY_ID
        valueFrom:
          secretKeyRef:
            name: aws-secret
            key: key
      - name: AWS_SECRET_ACCESS_KEY
        valueFrom:
          secretKeyRef:
            name: aws-secret
            key: secret
      - name: AWS_DEFAULT_REGION
        value: eu-west-1
    - name: terraform-show
      image: blokje5/terraform-aws:latest
      workingDir: "$(inputs.params.directory)/tmp"
      command: ["/bin/bash","-c"]
      args: [
        "terraform show -json ./tfplan > tfplan.json"
      ]
      volumeMounts:
        - name: data-storage
    - name: conftest-pull
      image: instrumenta/conftest
      workingDir: "$(inputs.params.directory)/tmp"
      command:
        - conftest
        - pull
        - blokje5.azurecr.io/policies:latest
      volumeMounts:
        - name: data-storage
          mountPath: "$(inputs.params.directory)"
    - name: conftest-test
      image: instrumenta/conftest
      workingDir: "$(inputs.params.directory)/tmp"
      command:
        - conftest
        - test
        - tfplan.json
      volumeMounts:
        - name: data-storage
          mountPath: "$(inputs.params.directory)"
    - name: terraform-apply
      image: blokje5/terraform-aws:latest
      workingDir: "$(inputs.params.directory)/tmp"
      args: [
        "apply",
        "tfplan"
      ]
      volumeMounts:
        - name: data-storage
          mountPath: "$(inputs.params.directory)"
      env:
      - name: AWS_ACCESS_KEY_ID
        valueFrom:
          secretKeyRef:
            name: aws-secret
            key: key
      - name: AWS_SECRET_ACCESS_KEY
        valueFrom:
          secretKeyRef:
            name: aws-secret
            key: secret
      - name: AWS_DEFAULT_REGION
        value: eu-west-1
This Task defines our deployment pipeline. The cp step copies over Terraform files from a ConfigMap in Kubernetes (normally you would be using GitHub (or another version control system) as a source for the Terraform files, but using configmaps is easier for local development). The next steps then initialize terraform in the /workspace directory and create a Terraform plan of the infrastructure changeset that would be applied by this “commit”.
In the conftest-pull step, the policies are pulled from a central docker registry. Then, in the conftest-test step, the Terraform plan is validated against the Rego policies that where pulled from the Docker registry. If the changeset triggers the deny rule, conftest will return an error message and a non-zero exit code. Tekton will stop the Task from progressing and the terraform-apply will never be executed. Exactly what we want if there is no Access Block in the changeset!
We can then reference this Task in a Tekton Pipeline:
apiVersion: tekton.dev/v1alpha1
kind: Pipeline
metadata:
  name: opa-pipeline
spec:
  tasks:
    - name: validate-terraform-plan
      taskRef:
        name: terraform-plan
And to trigger it locally we define a PipelineRun:
apiVersion: tekton.dev/v1alpha1
kind: PipelineRun
metadata:
  name: opa-pipelinerun
spec:
  pipelineRef:
    name: opa-pipeline
Normally, a PipelineRun would be created by an event, such as a push to a GitHub repository or a new image that is pushed to a Docker Registry. If everything went well, this pipeline will fail with an error stating which resource in the Terraform changeset is non-compliant. You can check the Tekton errors by checking the logs:
kubectl logs opa-pipelinerun-validate-terraform-plan-9fnmh-pod-63eafb step-conftest-test
This will show that indeed, there is a non-compliant resource:

Conclusion
In the introduction, I laid down some requirements to build in compliance as part of the development cycle:
- The latest version of the policies needs to be easily accessible by developers
- Updates to policies can quickly be applied accross the organisation
- Policies need to be validated on correctness
- Configuration changes can not be applied without validation
We walked through an example of how conftest can be used as tool to validate configuration changes across the organisation. By centrally managing policies and utilising a single deployment pipeline, you can ensure that changes are always validated against Rego policies. Using unit-tests in Rego ensures that policies function as expected. By fulfilling these requirements, your environment will remain compliant with whatever you define in the Rego policies.